Reacting to the sound in the room (AudioReactive)
“Making visuals move with the music” sounds hard, but there is really only one thing to do. The AudioReactive node turns sound into numbers, so you plug those numbers into whatever you want to move. That is all.
This page walks through four wiring patterns, easiest first. Patterns 1 to 3 are already enough for a real set.
1. Get the sound in
Drop an AudioReactive node and pick your audio input under Device.
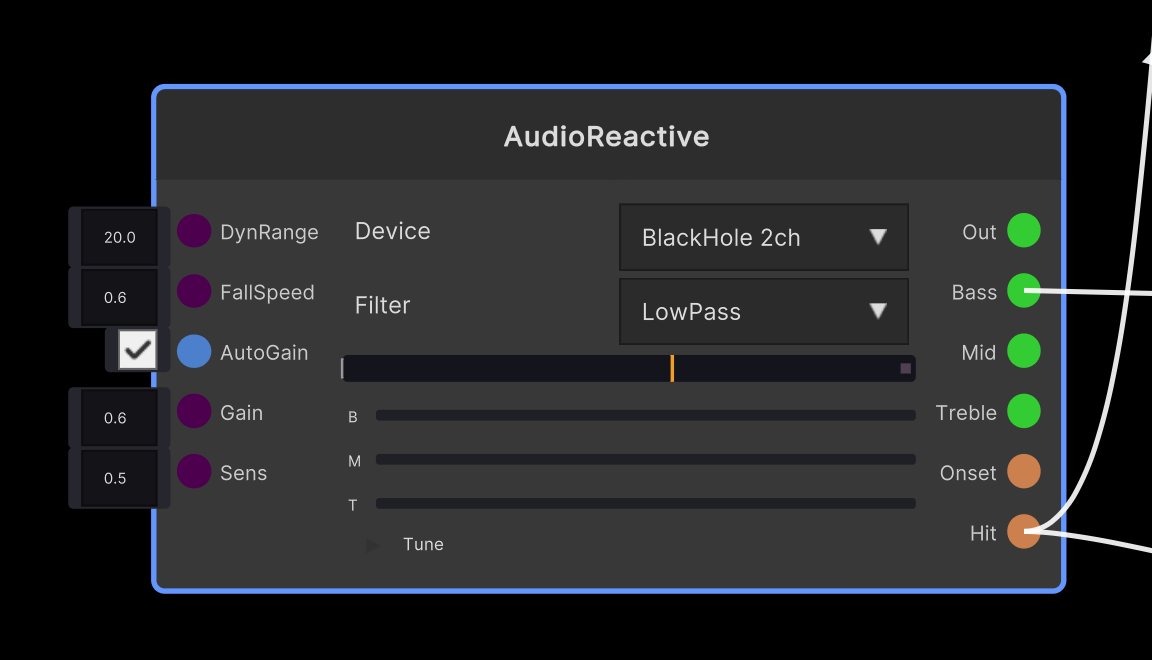
The Device dropdown lists the input devices your OS reports, as they are. You can point a microphone at the room, or — if you have a loopback device installed (such as BlackHole on macOS) — feed the audio your computer is playing straight in. The screenshot above has BlackHole 2ch selected.
There are six outputs.
| Output | What it carries |
|---|---|
| Out | Overall loudness (0–1) |
| Bass | Low band. Kicks and bass land here |
| Mid | Mid band |
| Treble | High band. Hi-hats and the like |
| Onset | A trigger that fires when the timbre changes (automatic detection) |
| Hit | A trigger that fires when loudness crosses a threshold |
This page only uses two of them: Bass and Hit. You set the Hit threshold by dragging directly on the meter in the node (default 0.6). Move it to wherever you want it to respond on the night.
For what every parameter means, see the AudioReactive node reference.
BPM is not detected from audio. All AudioReactive sees is “how loud it is right now”. If you want to ride the tempo instead, see Syncing to music (Beat Sync).
2. Push a fader up on loud sounds
This is the most immediately readable one. The opacity of a layer stacked on top rises and falls with the sound.
AudioReactive [Hit] → Curve [Trig] … Curve [Out] → LayerOpacity [In]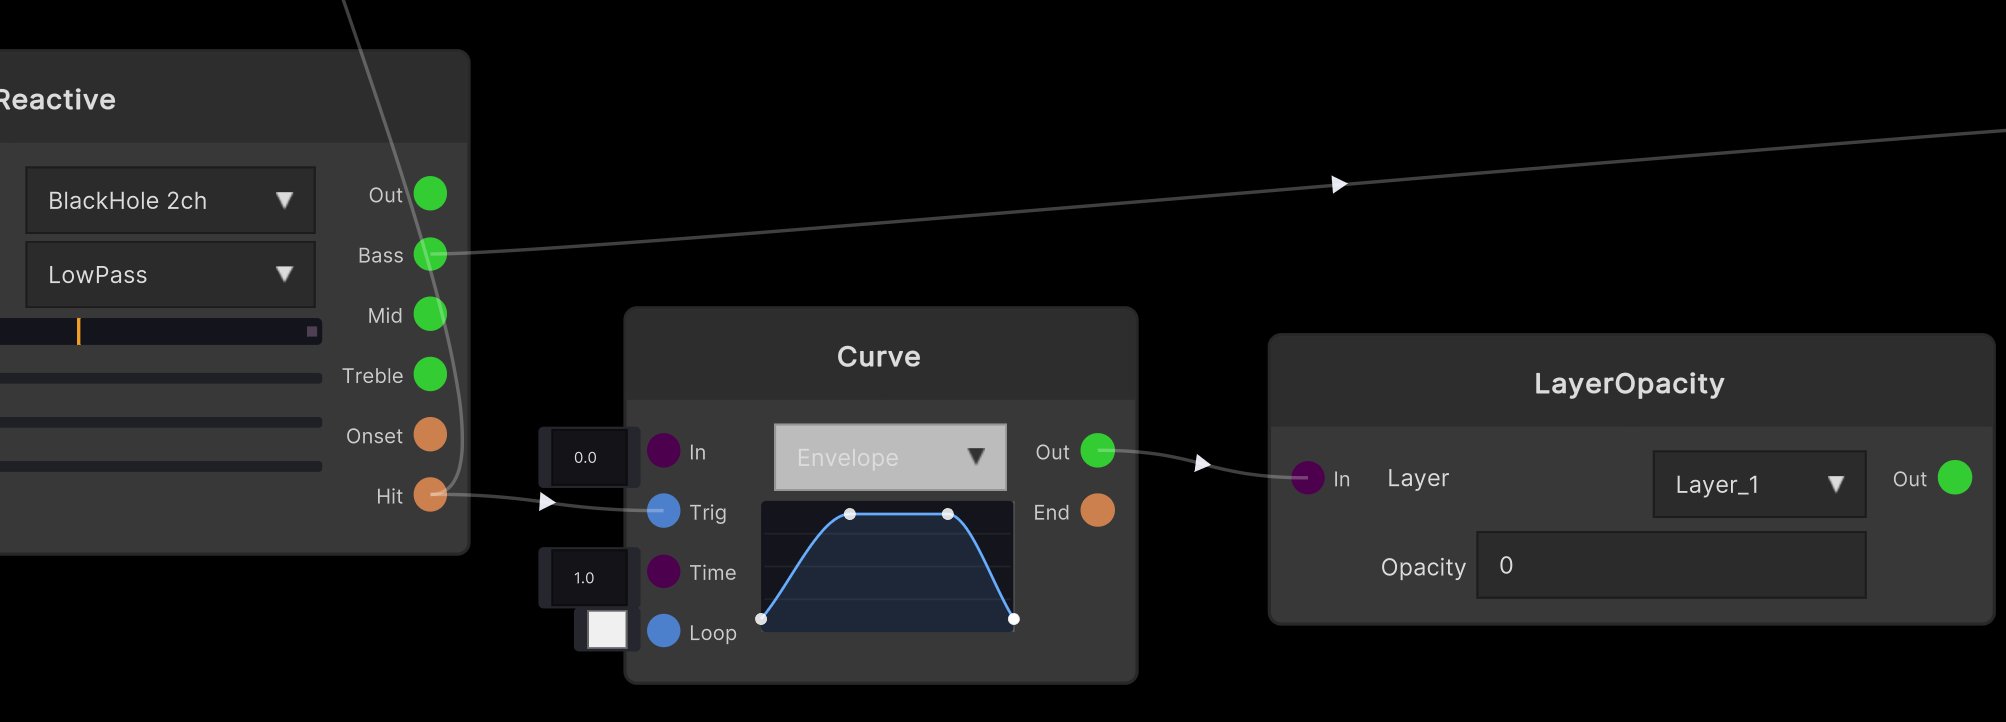
What this does is automate the fader move you would otherwise make by hand.
- Hit fires — a loud sound happened
- Plug it into the Trig input of Curve and the curve plays once from the start
- Send that output to LayerOpacity and Layer_1’s opacity follows the shape of the curve
The point is that Hit does not go straight into LayerOpacity. Hit only exists for the instant the sound happens, so wiring it directly just blinks once and ends. Putting Curve in between gives you a shape: rise, hold a little, fall back. The screenshot uses a domed curve, so it fades in, holds, and fades out.
Curve’s Time (1.0 second in the screenshot) is how long one pass lasts. Shorten it for a blink, lengthen it for something that breathes.
3. Drive effect strength from the low end
This one is simpler still — just connect it.
AudioReactive [Bass] → UV_XCutting [_Value]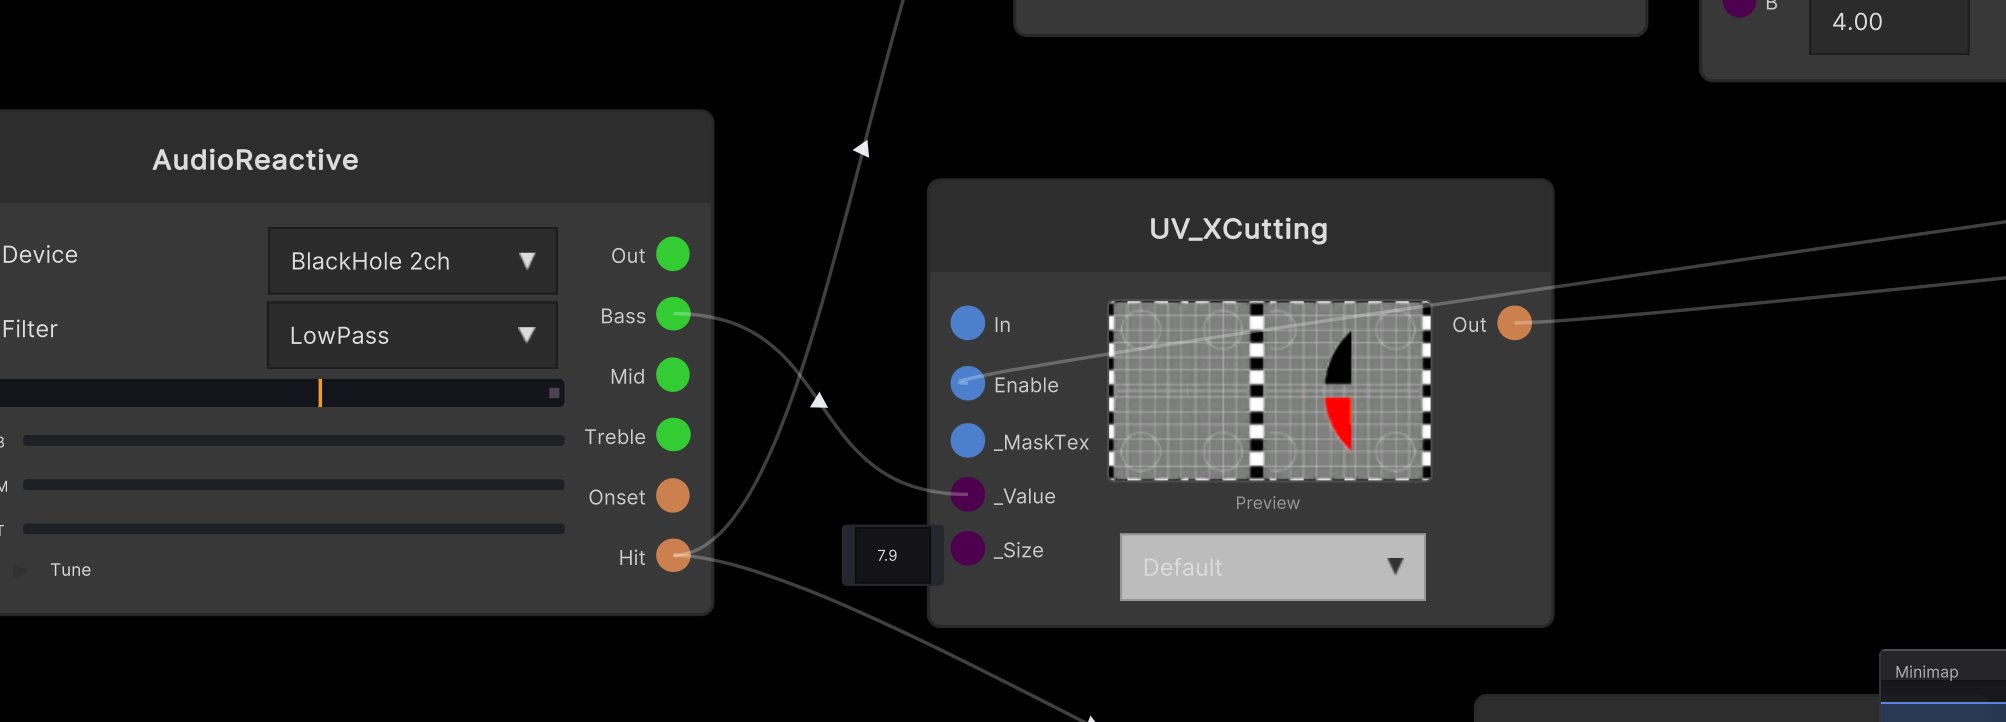
Bass continuously outputs “how loud the low end is right now”, so plugging it into an effect parameter means the effect is strong exactly while the low end is playing.
The destination does not have to be UV_XCutting. Any numeric effect parameter behaves the same way. If the result is too strong or too weak, put a Multiply or a Remap in between to scale the range.
Being able to choose the band is what makes this node handy: Bass to move with the kick, Treble for something that flickers with the hats.
4. Toggle an effect every four beats
This one is deliberately convoluted. Feel free to skip it. Patterns 1 to 3 already give you visuals that respond to sound.
The goal is to turn the effect on for two out of every four hits — switching effects on the beat, automatically.
AudioReactive [Hit] → Counter → Modulo → Minus → Toggle → UV_XCutting [Enable]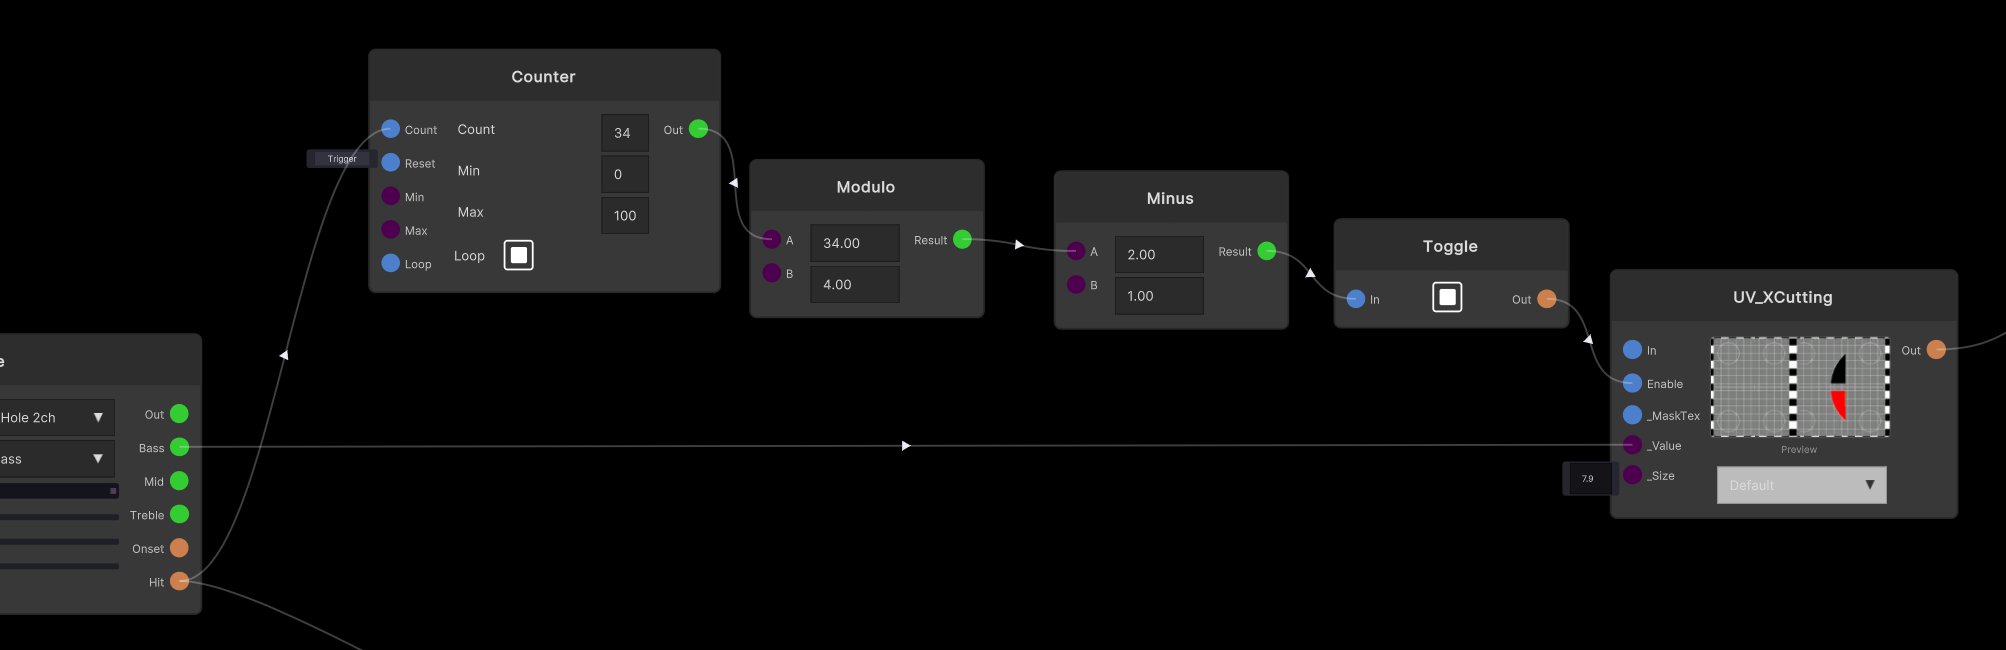
Node by node:
| Node | What it does | Values that come out |
|---|---|---|
| Counter | Counts up on every Hit | 0, 1, 2, 3, 4, 5 … |
| Modulo | Takes the remainder after dividing by 4 | 0, 1, 2, 3, 0, 1 … |
| Minus | Subtracts 1 | -1, 0, 1, 2, -1, 0 … |
| Toggle | Turns the value into ON / OFF | OFF, OFF, ON, ON … |
Modulo is what creates the “four beats”. Taking the remainder by 4 gives you 0–3 over and over, which is how you count beats.
Subtracting 1 shifts that to -1 through 2, and in Toggle -1 and 0 read as OFF while 1 and 2 read as ON. The result: two of every four are ON, two are OFF. Send that to UV_XCutting’s Enable and the effect switches on the beat.
Set Modulo’s B to 8 for an eight-beat cycle. To change the ON/OFF ratio, adjust Minus’s B.
Set Counter’s Max to a multiple of the Modulo value, minus one. The screenshot leaves Max at its default of 100, but 100 is not a multiple of 4, so at the moment it wraps from 100 back to 0 you get two 0s in a row and the beat slips by one. For a four-beat cycle set Max to 3 (which makes Modulo unnecessary altogether); for eight beats use 7.
Related
- AudioReactive — the parameters, and the difference between Onset and Hit
- Syncing to music (Beat Sync) — matching the BPM instead
- Curve — the node that turns a trigger into movement
- MIDI mapping — when you would rather drive it by hand